
FEATURES AND SHADING
Tutorials on footpads, adding shading , eye lids and lashes - not to mention noses ! There are videos, pdf downloads or read online.
Fun and not hard to do. Enjoy !
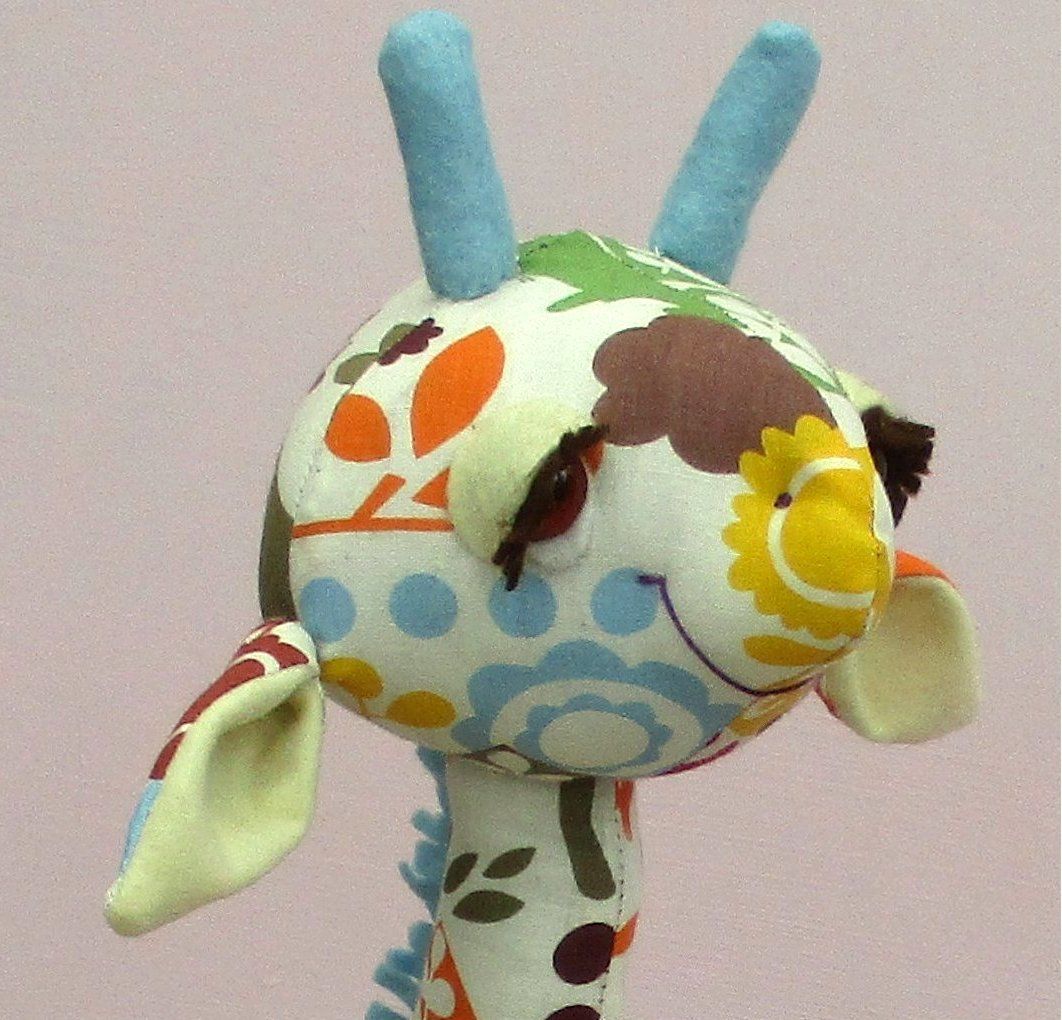
Simple doll's eyes. Drawing a template which can be coloured with pencil/pen or embroidered. Make sure to test your medium on the fabric first !
CREATING EYE LIDS
You can now purchase eyes with lids but I like the softer look you get by making your own. They also make your softie unique.
We can sew the eyelids in place, or needle felt them.
FELT LIDS AND LASHES
We'll start with felt lids (these can have felt eyelashes too ). Use a good, dense felt with fibres that won't break away when pulled. Felt is easier to work with than fabrics, which can fray and spoil the look.
- These felt lids work well on both glass and plastic safety eyes. Set the eyes in place (the lids looks best when eye-whites have been used - more on these here if needed : )
- Cut two half circles in felt, so they fit completely over the eye, with a little extra 5mm or 6mm at each side.
- If you want to add felt lashes, cut a strip of felt longer than the eye and wide enough to sit above and over the eye.
- Lay this on the eye and stitch the top of the lashes to the head (see below). They flap around here, but the lid will keep them in place shortly.
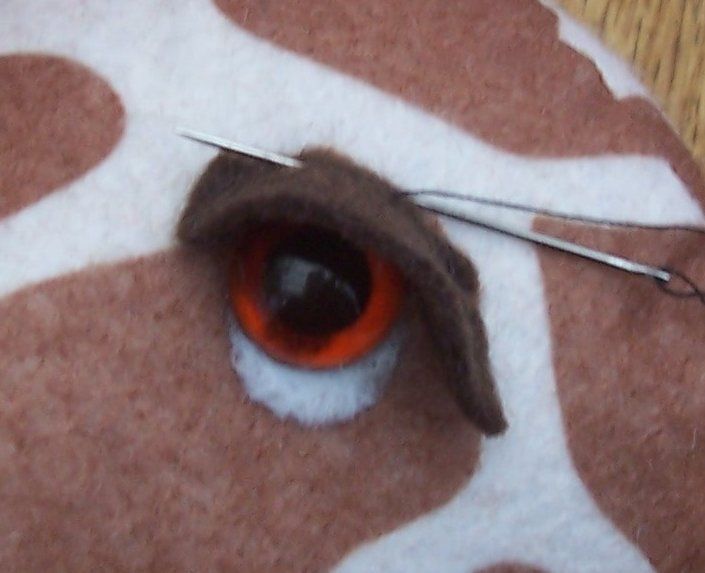
- Time for the eye lid now. Fold the bottom edge up a little to create a neater edge.
- Place the lid so that the lid sits above and over the eye. See below. Attach the lid around the curved edge with small stitches, as with the lashes. Leave the bottom edge, that we turned, free. If you have attached felt lashes, the lid should be sitting over these
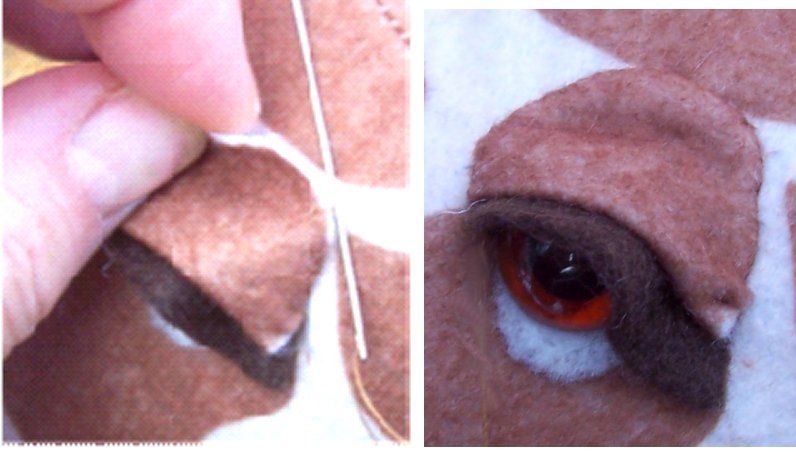
- If the lid is looking a little saggy (as mine in the pic above right ! ) then push a tiny amount of stuffing up under the lid to plump it out.
- Snip carefully along the edge of the lashes to fringe them and trim if needed.
- Sit back and admire your work : )

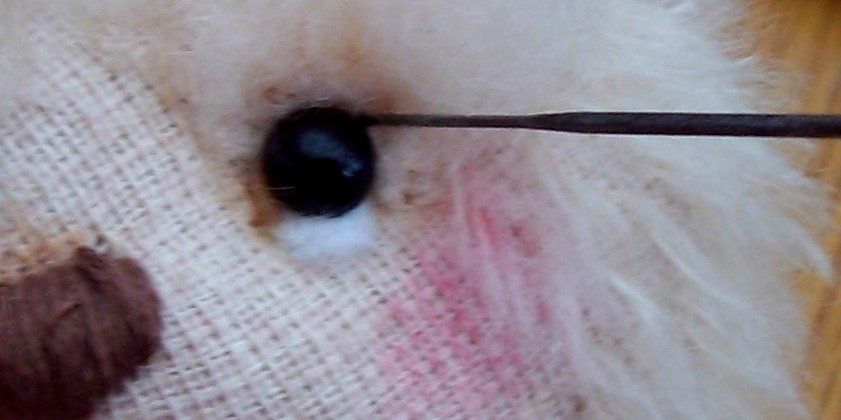
NEEDLE FELTED EYE LIDS
Probably my favourite way to create eye lids. These work best on glass eyes as the needle can break if it hits the washer on plastic safety eyes. Use a fine gauge dry felting needle (36 or 38) and keep you fingers out of the way !
- Start by taking two roughly equal pinches of felting wool. Felting wool does not come in strands, it is more cotton wool to work with.

- Anchor the wool in place by stabbing this through into the head. Work over the top of the eye (as close to the eye as you can but do not hit the eye) Keep at least 3/4 of the wool away from your needle and free.
- Do keep fingers away from the needle as the barbs bite !
- Keep stabbing to cover a thin layer of the wool over the area you want to be the lid.
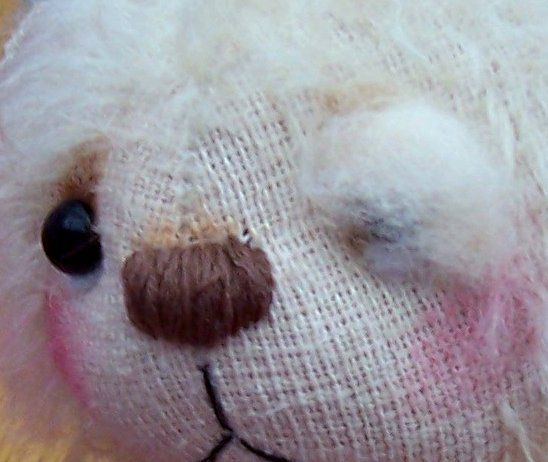
- When you are happy it is anchored, gently push the remainder of the wool down over the eye (see below). Will look really odd at this stage : )
- Continue felting the wool but now work into the wool only (not the head) Gently felt the wool downards and work all the way around the lid a few times
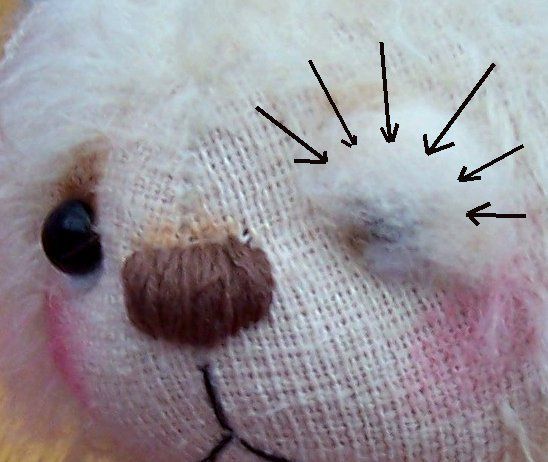
- Next felt upwards (careful to avoid the eye) We need the fibres to be as felted as we can.
- Keep working into the wool only
- Now we need to tighten up the lid, so keep felting but now go back to felting through the lid and into the head.
- Again, be careful to avoid the eye itself.
- Keep working until you have neat eye lid

CREATING NOSES
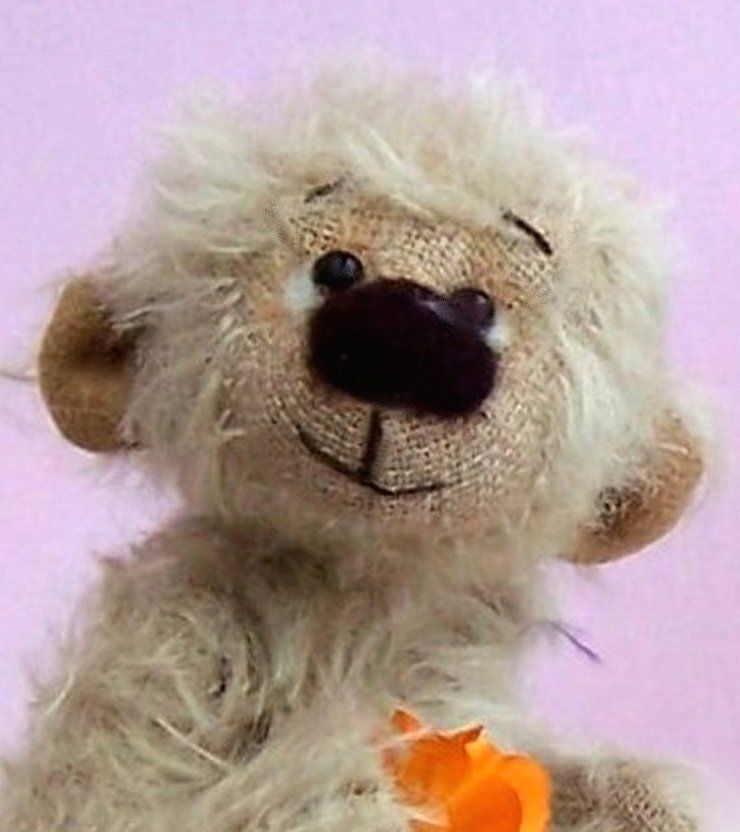
You may not think the nose is your bear's most important feature, but it can be, as it sits right in the centre of their face so you cannot miss it ! A good, well made nose is the perfect foil for their eyes.

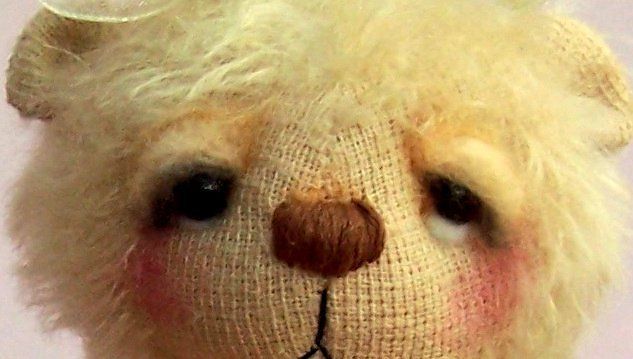
EMBROIDERED NOSES;
These are the most obvious way to create a softie's nose. They do not have to be as large as the bear above (he is just showing off his rainbow thread ! )
NOSE TIPS
- Always try to get both sides of the nose as symmetrical as you can.
- I always start at the center of the nose as this is easy to line up on the front head seam.
- Best to work on one side first, then the other.
- You can even resort to counting stitches to make sure both sides are equal.
- To create a neat line along the top edge of the nose, take your needle in at the top each time.
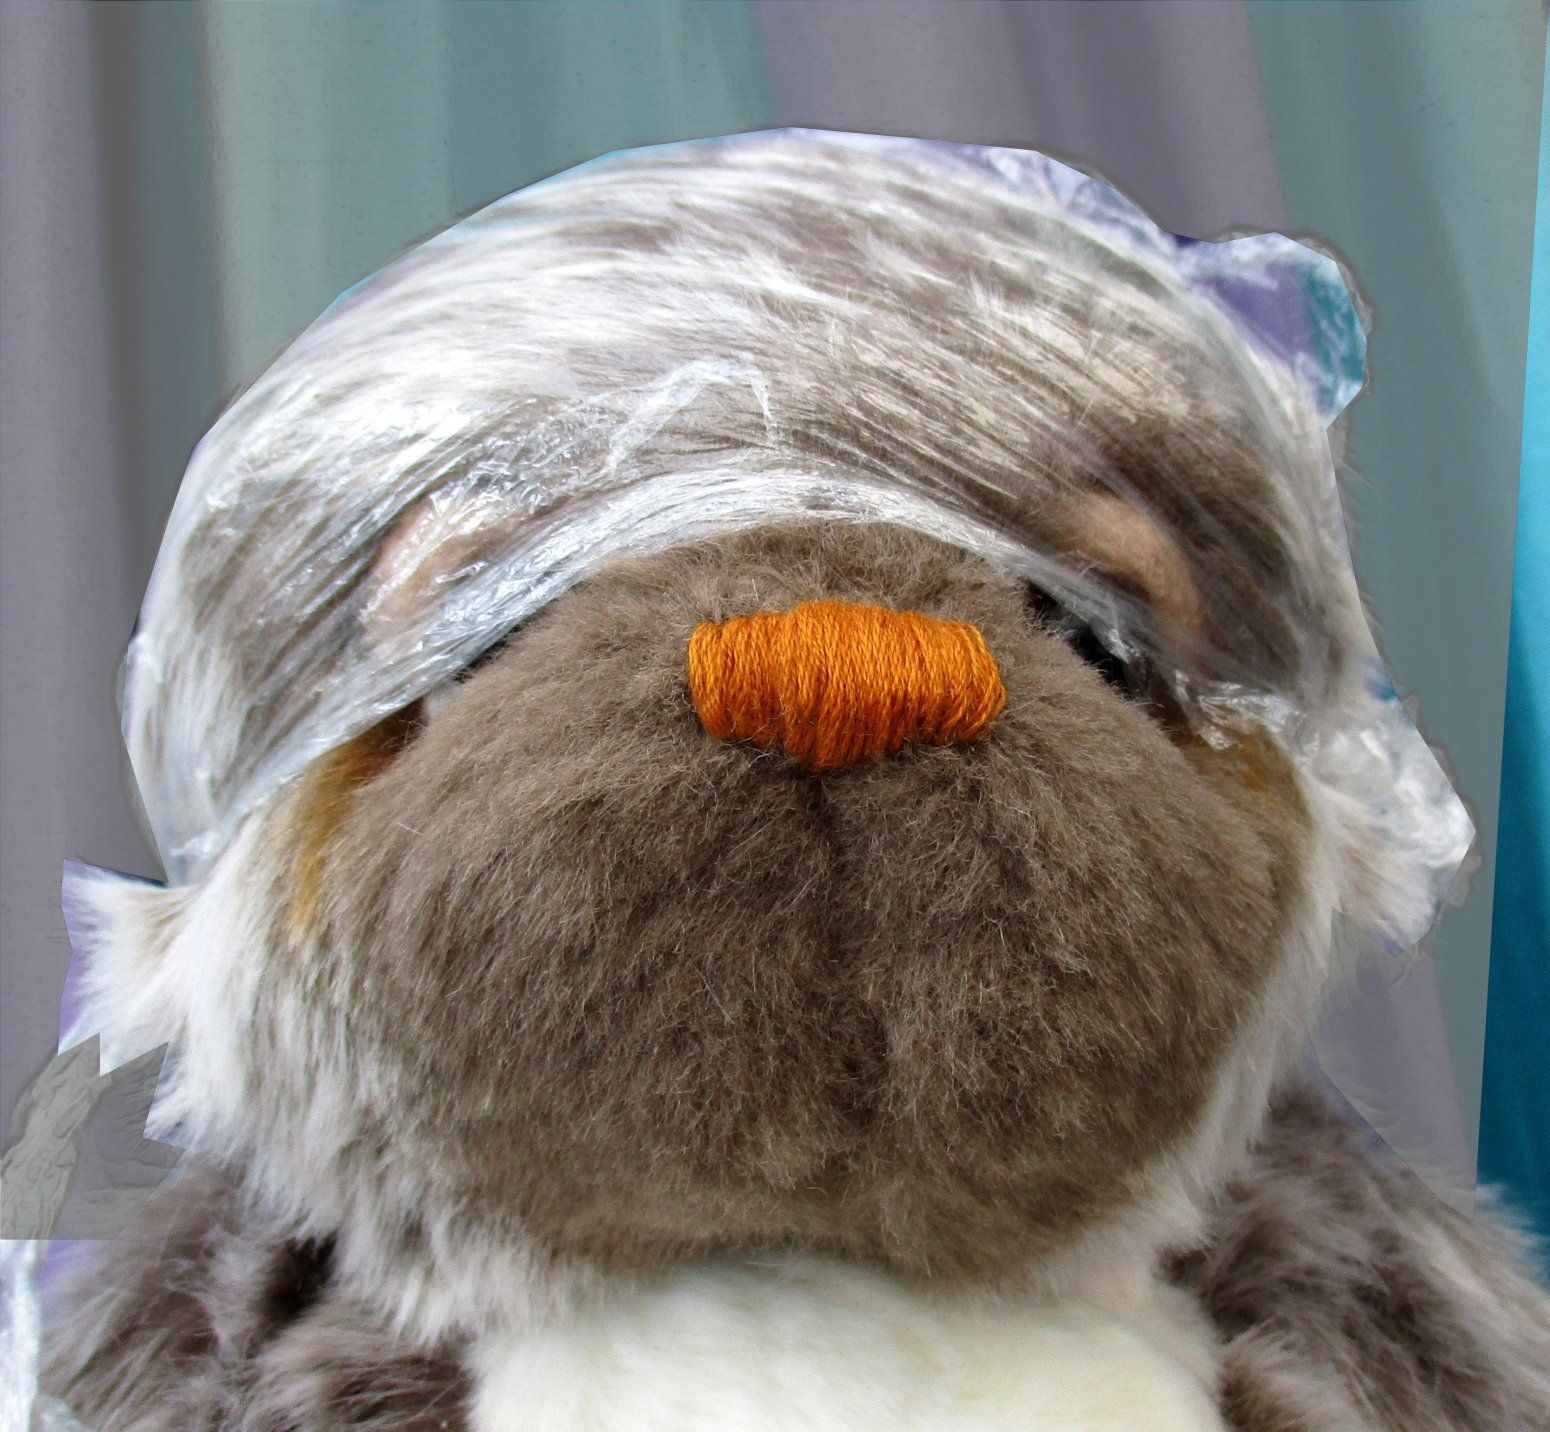
- Sometimes seams meeting at the nose can make embroidery difficult. I often have a tug of war with the nose and find a small pair of pliers helps to win and pull the needle through the thicker seams.
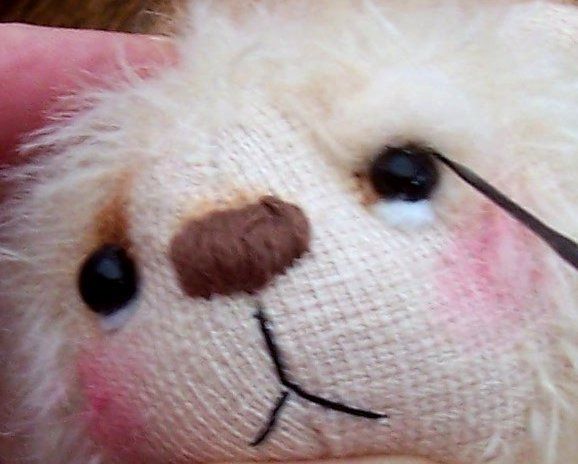
- Long fur has always been a nuisance for me when trying to embroider the nose as it easily gets caught up in the thread. The answer, wrap cling film around your bear's head to keep the fur out of the way (see above : ))
- Never be afraid to snip through the threads and start again if it looks wrong. The nose is far more accommodating than other parts of bear making !
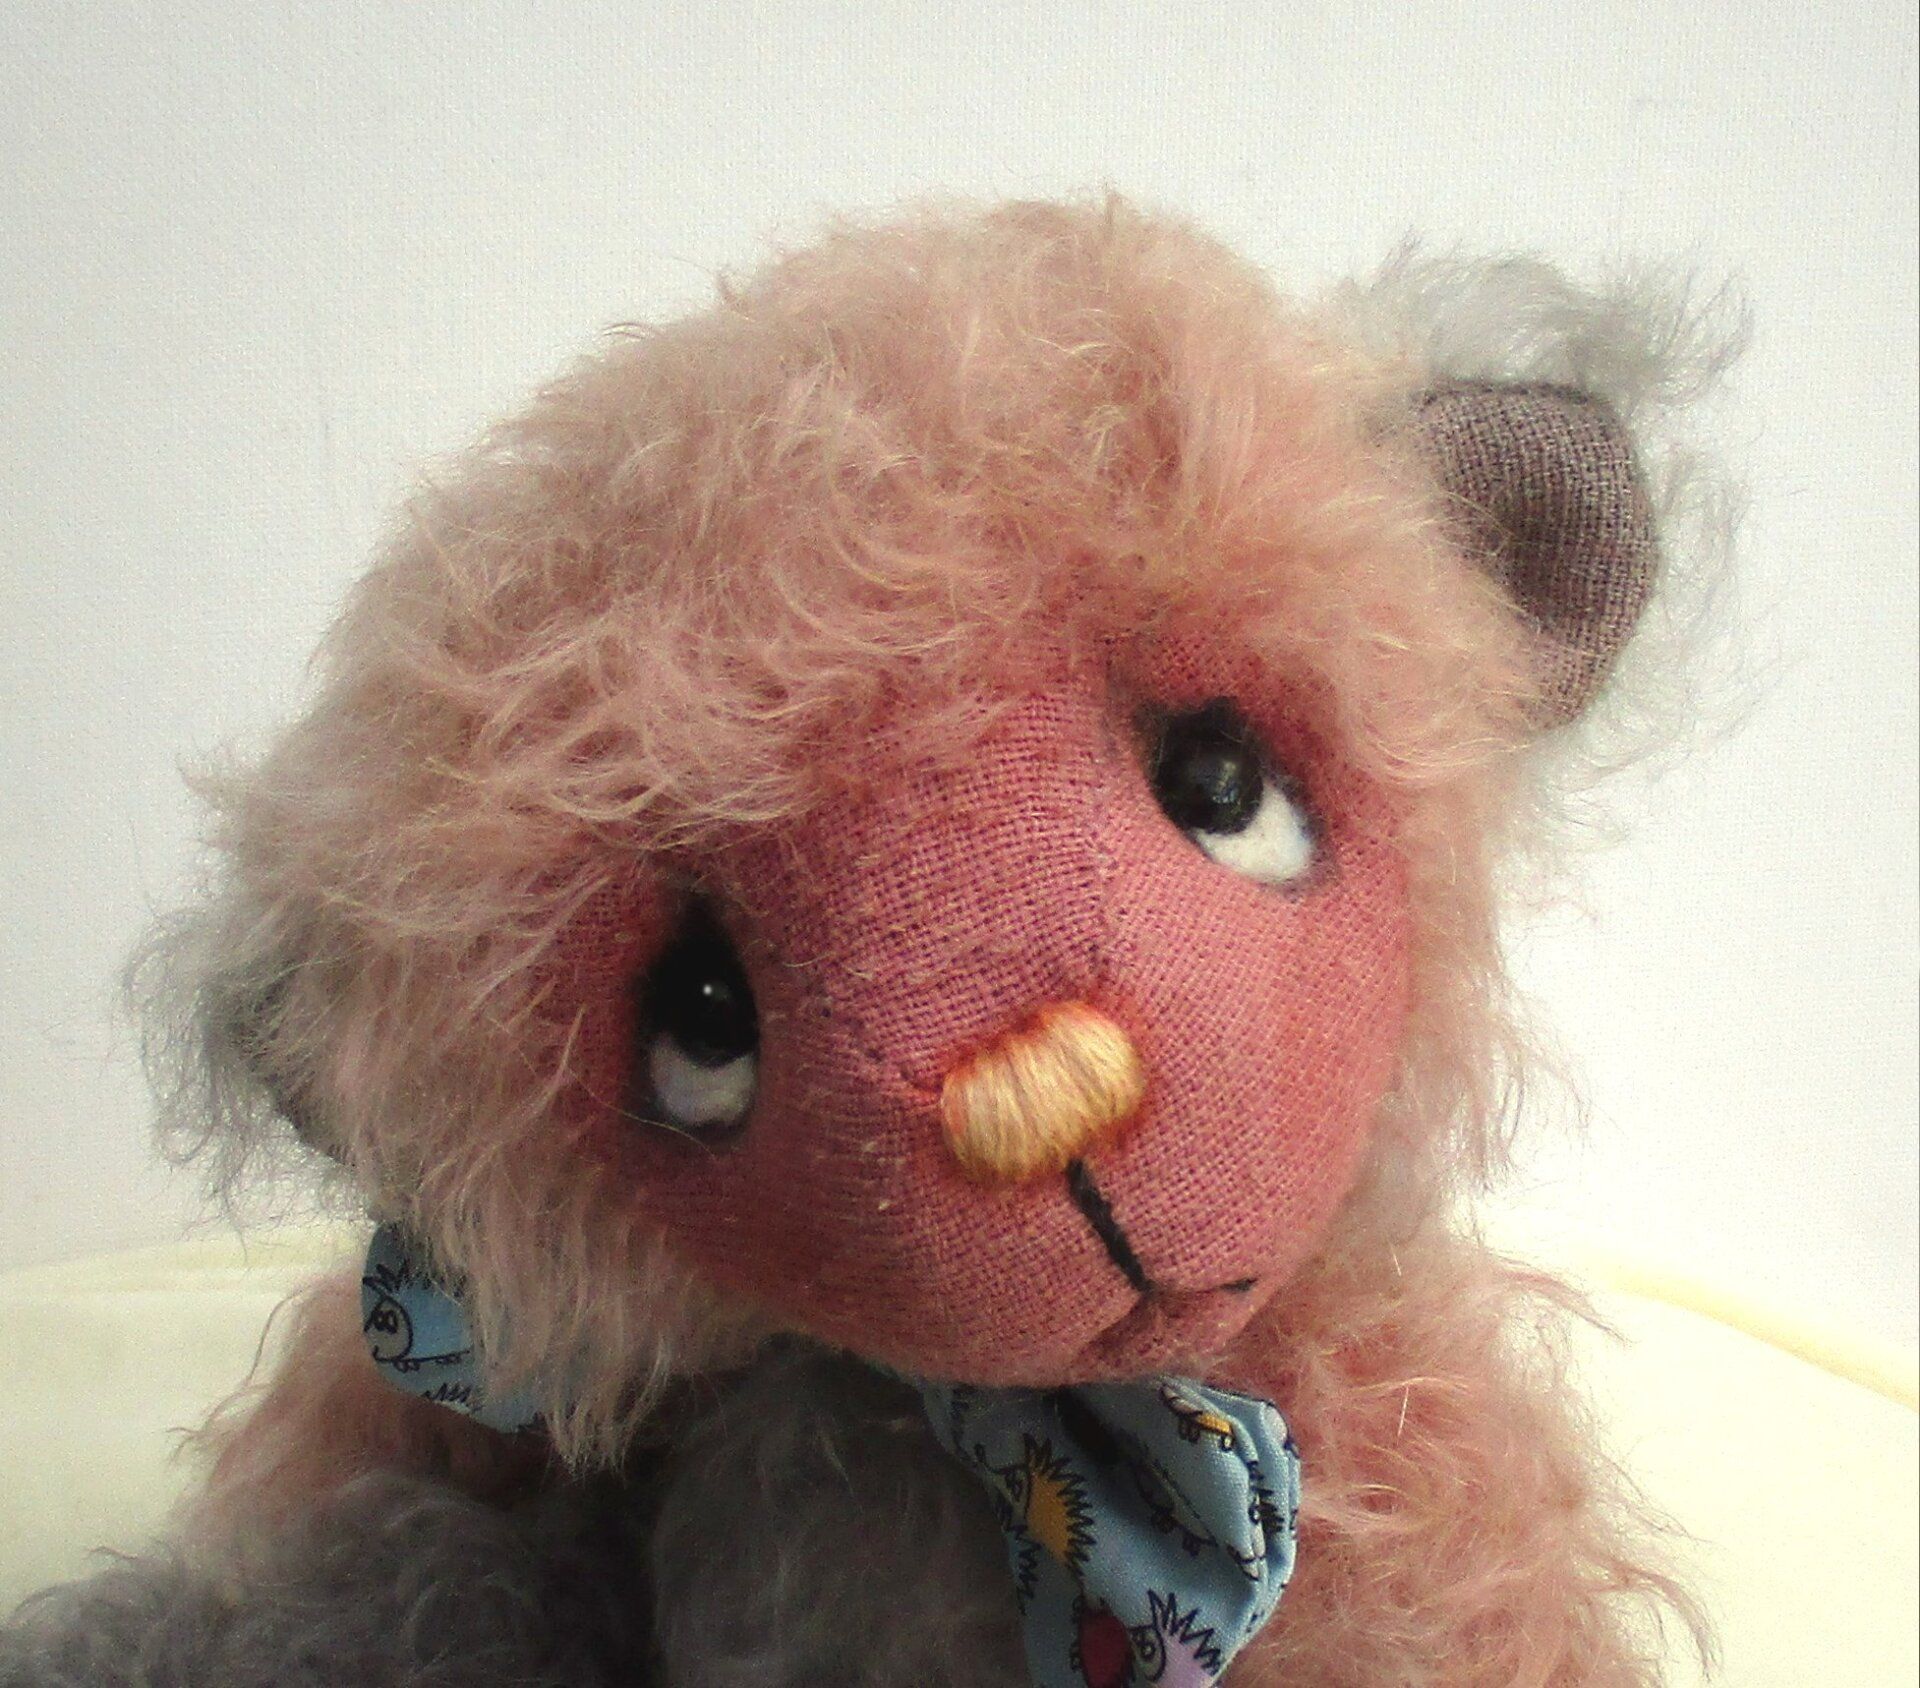
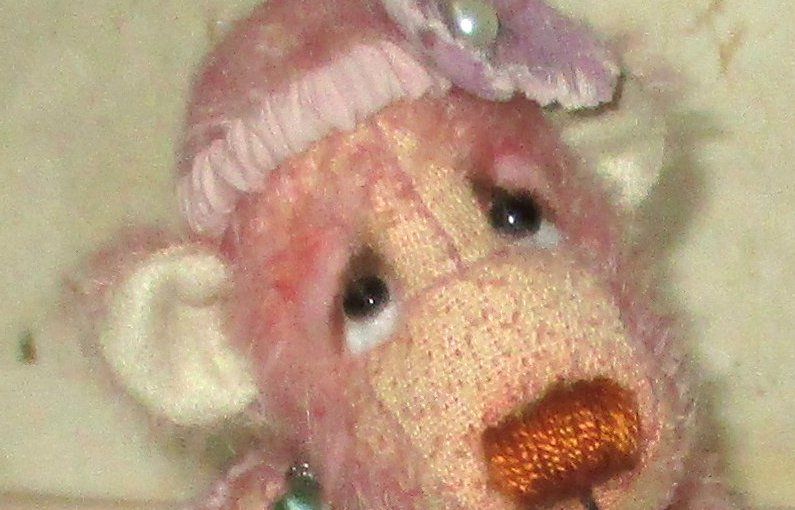
DIFFERENT NOSES:
Sometimes your bear will decide which style of nose suits him, other times it will be the nose that gives your bear his character.
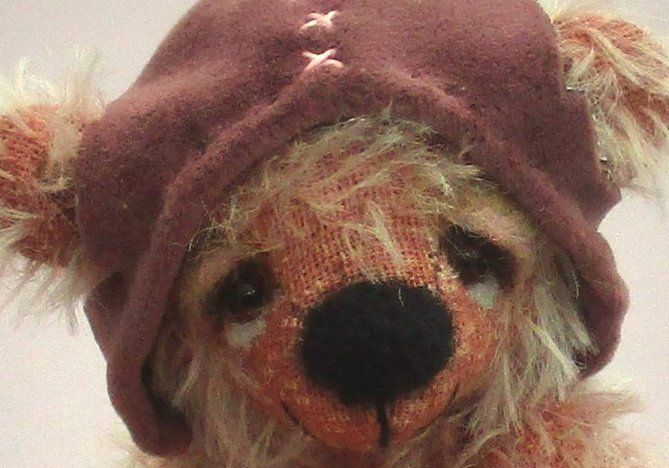
- You can see in the bears above how different noses can be. I thought the first bear very much suited a small, neat embroidered nose. Together with this smaller mouth, this gives him his sweet, innocent look.
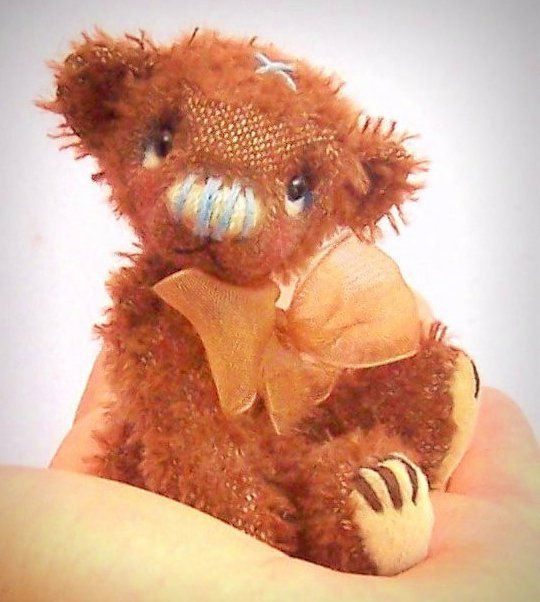
- The bear in the middle is actually very tiny and sitting in the palm of my hand but I decided a large nose, embroidered in two colours would give him more impact and used the end of the blue thread to embroider a kiss on the top of his head.
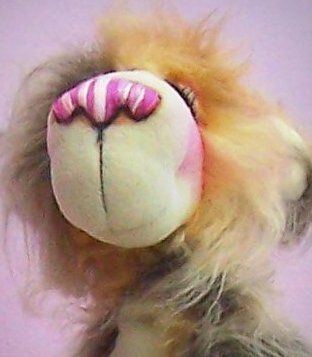
- The nose on the third bear adds to her haughty look. As the nose was very much part of her features, she has shaped nostrils. This is very easy to do (and works best on larger bears). Keep stitches in line along the top edge, but on each half, shorten the stitches towards the center, lengthening them again when you have a nice nostril in place. After all that work I like to emphasise the shape with a little pencil shading.
NEEDLE FELTED NOSES
You can achieve some lovely, soft noses by felting them.
Although it is possible to pull the roving away, do practice first before stabbing your bear !
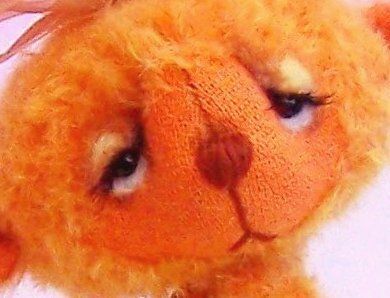
I always think felted noses work best on scruffier teds ( see my bear above : )
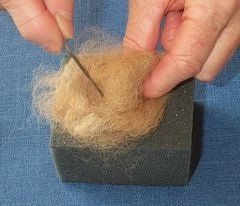
- Begin by taking a good pinch of your wool roving and rolling it a little in your hands. You can start the felting off on a sponge block if you have one but if you are confident felting, there is no reason why you can't start on the head.
Basically, when felt, we are using a very sharp (be warned, very sharp) needle with barbs to tangle the wool fibres together. The more we stab, the firmer the nose will be.
- To set the wool into place in the first instance, we need to stab into the head itself to tangle the wool into the stuffing. Pull a small amount of the wool from your rough ball and stab this into the nose are to create a thin layer.
- Next bring in the rest of the wool and stab a few times through into the head. This should secure it quite firmly. See the section of felting the lids above for more info if needed.
- Now we can work on the nose by stabbing through the wool roving, keep varying the direction and no longer stab down into the head, we need to firm up the nose itself now.
- Continue working until you feel the nose is firm enough and you are happy with the shape, then stab once more back into the head a few times.
And by now you should have a cute softly felted nose. I don't think my Arnold bear above would look the same without his felted nose : ) Hope it works for your softie too.
